Leopard Tips

October 26th, 2007

leopard.png

Well Apple’s newest operating system is finally out. Mac OS X Leopard! And so far my experience with it has been more than positive. There are a ton of reviews out there, so I’m not going to get into what is so very cool about this new Operating System, but I do want to offer some tips and tricks. I plan on adding to these as I spend more time in Leopard, so do check back soon!

  • If you want to get Keyword Manager working with iPhoto, install the newest version of SIMBL first (here), and then install Keyword Manager. Works like a charm. If you already installed Keyword Manager, be sure to uninstall it first, then install SIMBL, and then reinstall Keyword Manager. The developers have released a new version of Keyword Manager that is compatible without additional SIMBL installation, but it is currently beta. You can find it here.
    keywordmanager1.png

  • If you want to choose the color of your menubar, and not have it depend on your wallpaper, you can get a program called LeoColorBar, which lets you choose any background color for your menubar for any wallpaper.
    leocolorbar.png

  • If you are not a fan of the new 3D dock and want the old Tiger one back, you can do so by getting an application called 2Dornot2D, which in addition to creative name and horrible icon allows you to switch between the different dock styles at the push of a button.
    dock.png

  • If you do not want an additional icon in your dock for Time Machine, there is a great and simple Dashboard widget called Time Machine Launcher that puts a button on your Dashboard to start Time Machine. Its available here.
    Time Machine Launcher

  • If you want to force Time Machine to do a backup, all you have to do is right click (or CMD+Click) on the Time Machine icon in the dock and click Back Up Now. You can also stop a Time Machine backup this way. So far this only works with the dock icon and not the above widget.
    forcetimemachine.png

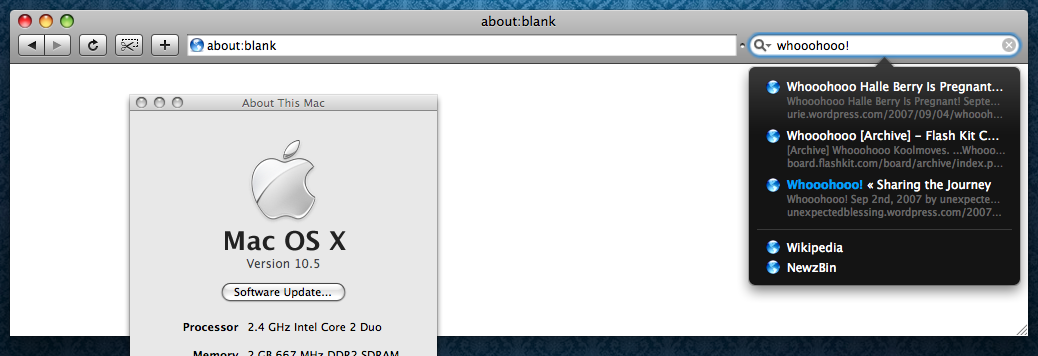
  • If you want programs like Inquisitor and SafariStand to work, their developers have released updates that make them Leopard compatible. Other plugins can be enabled using PlugSuit. SafariBlock does not currently work with Leopard but the developer might release an update soon depending on several factors. I will elaborate as soon as I know more.
    inquisitor

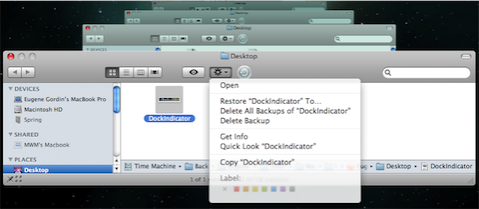
  • If you find that bright white dock indicator to be a little too intrusive, there’s a great little modification that I found at MacThemes that fits nicely. Take a look below:
    dockindicator.png

  • If you want to delete a certain file or files from a specific or all Time Machine backup, you can do so by opening Time machine and finding the files or folders you want to remove from backup. Then select the file or folder and click the “gear” icon in the Finder toolbar. You will then have two options: 1) Delete All Backups of your file or folder or 2)Delete this backup.
    DeleteBackUp.png

  • If you mostly use Time Machine for finding files in Finder, and do not want to have a Time Machine icon in your dock to use it, you can add a Time Machine icon to your Finder toolbar. Just browse to Time Machine in your Applications folder and drag its icon to the toolbar and hold it over the toolbar for a second. You will see the other toolbar icons move over to make room for the Time Machine icon. You can also move the icon position by holding down the CMD key while clicking and holding any icon in the Finder toolbar. See the results below:
    TimeMachineFinderIcon.png

  • If you think the new Stacks feature is annoying or ugly, or simply unusable, you can mimic the Tiger dock folder behavior (partially) by creating an alias for the folder you want (right click and go to create alias), and then dragging it to the right side of the dock. This will not, however, allow you to browse the contents of the folder when you ctrl+click or right click. It simply give you a shortcut to the folder with an unchanging icon in your dock. Yes, I know, the arrow for the alias is ugly but not nearly as ugly as the icon for last thing you downloaded. UPDATE: If you want to get rid of the alias arrows, you can do so by following these directions. Heed the warning in the article however, because not being able to tell between alias’s and the actual folder they link to can get you in trouble!
    DownloadsAlias.png

That is all for now but check back soon because I’m sure I’ll find more helpful tips from around the web!


Returned with Lessons Learned

September 3rd, 2007

norway.png

I know what you’re thinking, you want to give me extra points for having a title that is relevant and that rhymes. I know, I know, its a gift.

Well I’m back from Europe now, and the trip, in all senses of the word was eye opening. Especially in the technological sense, which is the reason behind this post.

One week into the three week trip, my Mac Book Pro died. Now when I say died, I mean that it would not get past the gray apple loading screen, and would not boot from a restore disk.So, for the rest of my trip, I had a beautiful aluminum brick to lug around Europe. As it turned out, the hard drive partition got corrupted somehow between Germany and the Czech Republic, and a simple wipe of the hard drive and repartitioning solved the problem. In the end, the only thing I lost was 12 photographs and 2 videos from the trip, and the rest I was able to either recover from the hard drive or alternative sources. I was lucky. I brushed over it just now, but let me say it again: I had to completely erase my hard drive and repartition it. All of the data on it – gone. Let me now explain what I did right, what I did wrong, and what I learned as a result of the whole traumatic experience.

Let me first explain what I did right:

  • As an avid proponent of backing up everything, I made sure to back up my entire hard drive to my MyBook external drive before leaving. That way, all of my data that was on my computer at the time of my departure would not be lost. In fact, it was backed up using SuperDuper, which means that I had a fully bootable backup of my Macbook’s hard drive.
  • Since we had internet access on the trip pretty much every night, I uploaded a number of photos from each location to my Picasa Web Album, and used their photo mapping feature to give people a better idea of where the photos were taken (this is a great little feature).

That was about it for correct action on my part. Here’s what I did wrong:

  • On the trip we used my Macbook Pro for GPS guidance which, while the Macbook Pro worked, was sweet. The way I did it was using Microsoft’s GPS Locator and Microsoft’s Autoroute Europe 2007 running in Parallels Desktop for Mac. While on the surface this may seem like a good way of getting GPS driving navigation, think about your hard drive spinning while bumping around the broken Czech Republic roads, and you have yourself a recipe for hard drive failure (which I subsequently experienced).
  • After being very careful to back everything up before leaving, I proceeded to import my one of a kind trip photos onto my laptop every night, not realizing that if my hard drive died, it would have taken my photos with it, never to return.
  • In trying to keep up with all of the technology news while traveling, I installed a program that was beta. This too might not seem like a big deal, but see below.

I look back at that list and I just want to kick myself for it. I guess life took care of that however. Here’s what I would have done differently:

  • Running a laptop in a car is just a bad idea, laptop or anything else. I should have just invested some money in a TomTom or the like, and gotten my GPS guidance that way.


  • I should have uploaded all of my photos, not just some, to my Picasa Web Album or the like. I could have even split it up, keeping the ones for everyone to see in the album I was using, and uploading the rest to a private album just for safe keeping. With the gigabyte of storage (currently, and Upgradable), this is more than enough for a three week trip, especially since you can lower the quality slightly with Picasa’s iPhoto Uploader.


  • I should not have installed ANY software (including Apple software updates) while away from an accessible full backup of my system. This is just a bad idea, and can lead to diminished system stability at the very time you need it most.


  • I should have backed up my computer’s hard drive not only to my MyBook but also to an online storage provider. Although it takes quite a while for your machine to back up initially, a quick daily online backup can provide the comfort and security that my MyBook provides at home. Furthermore, an online backup (one that is secure), allows you to have full access to ALL of your files while traveling – with your computer or not. This is a GREAT feature I wish I had.

Well, these are all things I now know and have begun to practice. I am currently 15 gigabytes into a 130+ gigabyte backup of my entire system online. I am doing it through a company called Mozy, which offers very affordable backup with the ease and security I have become accustomed to on my Mac. I paid $55 for a year of unlimited backup, which is quite a deal, especially given everything that Mozy offers. Mozy has a free version of their software too, which offers 2 gigabytes of backup space without paying a dime. I highly recommend both Windows and Mac users check them out (the Mac client is currently in Beta, but has come a long long way). Also, don’t believe everything you read – although I read otherwise, Mozy’s technical support is VERY helpful and responsive.

Well, looking back at the post above, I guess you could sum up my advice with one word: redundancy. If you only have one of something (such as a photo), do everything you can to back it up. You never know what can happen, especially while traveling.

Back in Three…

July 15th, 2007

Mailplane

..Weeks. Although I’m sure it has become clear to you all that I do not post regularly on the site, I think its my duty to inform you that there shall be no posts for three weeks because I will be in Europe. However, as with every long trip I take, I will be keeping a daily blog, which you can find here.

Thanks,

Eugene

PS: The icon for this post comes from a new Mac application for Gmail, called Mailplane. Its a very promising program which is currently in private beta.

I Use This

June 28th, 2007

I Use This

People sometimes ask me how I find out about new versions of the software I use. Since I use a Mac, there are several options such as MacUpdate, Version Tracker, and different Mac blogs. However, the best one isn’t any of those, its a site called I Use This.

I Use This is a very unique approach to software management, because it adds an element of social networking to it. Basically, when you create a (free) account, you go through the VERY comprehensive IUseThis application directory and select the software you use. To speed up this process, you can browse the list of applications by their popularity, and then search for the ones you didn’t necessarily find in the list. For an example, you can check out my IUseThis profile, here. You can even add friends, and browse the apps they use to see if there’s any new apps you don’t have.

That’s great Eugene, very nifty, but how do I get updates on the software I use? Well, once you create an account, and pick the software you use, IUseThis automatically generates an RSS feed for you that you can subscribe to, issuing a new post to you when there’s an update for one of the the apps on your list (see my post on RSS if you don’t know about it). Very cool. But it doesn’t just stop there, you can also subscribe to any member’s feed, so you can get updates even when you don’t have an account.

Although IUseThis is currently for Mac only, they are reportedly working on a Windows side, so stay tuned. Either way, check IUseThis out, and stay in the know!

Also, as a sidenote:

I wish I had a cool total number of posts posted to tell you about. I wish I had done this post a while ago, considering the anniversary is almost over. But, nonetheless, June marks the one year anniversary of Interesting Finds, and I am pleased to offer more than 50 posts (58 to date!) with tips for Mac, Windows, and everything in between. Hope you’ve enjoyed it, and as always, I’m always happy to receive feedback!

Clean Up, Automatically

June 28th, 2007

Hazel

I’m pretty anal about my stuff. Ask my friends, they’ll undoubtedly agree, I like to keep a clean house. Therefore, just as I like my room clean, I like my computer clean too, especially when it comes to my desktop.

As announced at WWDC, Mac OS X 10.5 Leopard will include a “new” desktop feature called Stacks, which basically allows you to quickly access your downloads folder in a Apple-esque, beautiful way. The reason I have the word new in quotes is because this feature is technically available right now in OSX 10.4 Tiger, albeit not as pretty. I used to use this method to access my Applications, before I realized that Quicksilver blew this method out of the water.

Currently however, most people’s download folder (on a Mac) is their desktop, which tends to lead to uncurtailed clutter, only justified by easy access to the files you just downloaded. Stacks (in Leopard), and moving your downloads folder to somewhere other than the desktop and using the folder method (in Tiger, mentioned above) can help clean up this clutter, but both don’t quite solve the problem.

In fact, both methods move your downloads away from your desktop, like throwing all of your clothes in your closet and shutting the door, merely hiding the problem instead of fixing it. That’s where Hazel steps in, cleaning up your closet folders based on whatever criteria you want. Let me give an example:

Since I read a lot of music blogs, I often find myself downloading single mp3s here and there that I find in posts. These files then sit in my downloads folder until I drag them into iTunes into my Music To Explore playlist. However, with Hazel, I can automate this action, telling Hazel to monitor my Downloads folder for mp3 files, and, when it finds some, to add them to my Music To Explore playlist and then delete the files from my Downloads folder. This is all done VERY simply with Hazel’s straightforward interface, and rules can be created to do all kinds of interesting things. I quote from TUAW:

“Hazel can automatically import image files into iPhoto, music into iTunes, add Spotlight comments, organize files into folders and even subfolders, add Finder color labels to files, run AppleScripts and so much more. Hazel can even manage your Trash for you by setting a specific time frame after which older (but not all) files should be deleted, or even a size limit that the Trash should be kept under (say, 2 GB). All this is done completely and transparently in the background, allowing you to get things done while Hazel works its magic.”

Hazel is a very cool program, and can help remove the clutter on your Mac, regardless of where the clutter is. Check it out at Noodlesoft, its got a free demo version on the site and the program is only $16. If you have any questions on how to set up Hazel, leave me a message and I’ll gladly help you out!

Switch Tabs Faster

June 24th, 2007

Firefox Add Ons

I’m a big fan of tabbed browsing with Firefox. I pretty much open every new link in a new tab, and click most links while holding CMD – or ctrl for you PC folk – (which opens the link in a new tab while keeping the current tab in focus. However, switching or cycling through tabs was not as simple as I had hoped. Since I really like the way Adium switches through tabs (CMD + right arrow or left arrow), I found a way to recreate this shortcut with Firefox. The method is a little hairy, so if you like the way you interact with Firefox’s tabs just fine, don’t worry about applying this little customization. Otherwise, read on!

In order to do this, you install a Firefox extension called Keyconfig. Once installed, go to Tools –>Keyconfig–> Add a new key. In this window, name your new key whatever you like (I called mine Switch Tab Left and Switch Tab Right). For Switch Tab Right, replace the part that says /* Code */ with: gBrowser.mTabContainer.advanceSelectedTab(1,true); Then click OK, and in the boxto the left of the Apply button, click once and then press the shortcut on your keyboard that you want to map to switch to the tab to the right (I used CMD+right arrow). Then click apply. If you get an error about the shortcut you chose already being used, look at the list and see what action is using it, and if its not important to you, just disable it by clicking Disable. Repeat this process for Switch Tab Left, this time replacing /* Code */ with gBrowser.mTabContainer.advanceSelectedTab(-1,true); and mapping the shortcut to the combination that you want for switching to the tab to the left (I used CMD+left arrow).

Keyconfig is a great little tool that adds just that little bit of flexibility. Check it out if you’re interested in changing some things about Firefox.

Image to Icon

June 21st, 2007

FastIcns

With the release of Parallels 2.5 (and 3.0 now for that matter), I found myself in need of icons to replace the ugly Windows ones that would pop up in my dock when I ran a windows program. So I searched the regular places for icons, but often found images (jpeg, png, gif) not icons that I liked.

Therefore, on my search for a program that would convert images to icons, I happened upon FastIcns, a program that lets you drag image files into it and it will automatically let you save it as an icon of all kinds of sizes (even 512×512 for Leopard Support!). The cool thing about the program (other than the simplicity of it all), is its interface.

autocad

Once you run the program, it opens a revolving cube that you can drag images to from Finder. It’s by no means a necessary feature, but a unique interface that made me appreciate independent Mac developers, yet again.

Once you dragged an image file to the cube, double click on the cube itself to save the image as an icon. I choose the “Resource Fork” filetype and install the icon using the “Get Info” method using Macworld’s simple instructions:

  1. In the Finder, select the file or folder whose icon you’d like to use.
  2. Hit Command-I (File: Get Info).
  3. Click on the small icon image at the top left of the Get Info window.
  4. Hit Command-C (Edit: Copy).
  5. Close the Get Info window.
  6. In the Finder, select the destination file or folder for the custom icon.
  7. Hit Command-I to open the selection’s Get Info window.
  8. Click the small icon image at the top left of the Get Info window.
  9. Hit Command-V (Edit: Paste) to paste the custom icon.
  10. Close the Get Info window.

Try FastIcns out for yourself, its really quite simple and a great little too (and free to boot!). Check out the program and let me know what you think!

A Smarter Clipboard

June 21st, 2007

QuicksilverClipboard

Have you ever copied something from one place, intending to paste it somewhere else but you never actually pasted it? Later you realize that you have since copied something else to your clipboard, and that first clipping is now gone? I do it all the time. I just forget that I wanted to paste that paragraph or message, and move on to copying other things.

Well, luckily our good (and extremely helpful) friend Quicksilver has the perfect solution for this – the clipboard module. Basically, once you install it, it keeps track of the last 50 or 100 items on your clipboard, and allows you to easily access and paste them, even after you copied something else. To try it out:

  1. Open your Quicksilver preferences
  2. Click on the Plug-ins button in the toolbar
  3. Click on the All Plug-ins section in the left column
  4. Look for and check the box next to the Clipboard Module (this should install it)
  5. Once installed, click on the Preferences button in the toolbar
  6. Click Clipboard in the left column
  7. Check the capture history box
  8. Choose how many clipboard items you want Quicksilver to keep track of
  9. Check the Hide after pasting button (optional)
  10. Close the preferences window

You’re all done. Now when you want to see your clipboard, open Quicksilver like you normally would and press Apple+L. You should now see a clickable list of what’s on your clipboard. Just click on the item you want and Quicksilver will not only put the item at the top of the list, but also paste the item in whatever field you have clicked at the time.

Its a very simple, smart solution for a common problem. Try it out and let me know if its helpful!

Apple-ize Google Reader

April 17th, 2007

macgreader.png

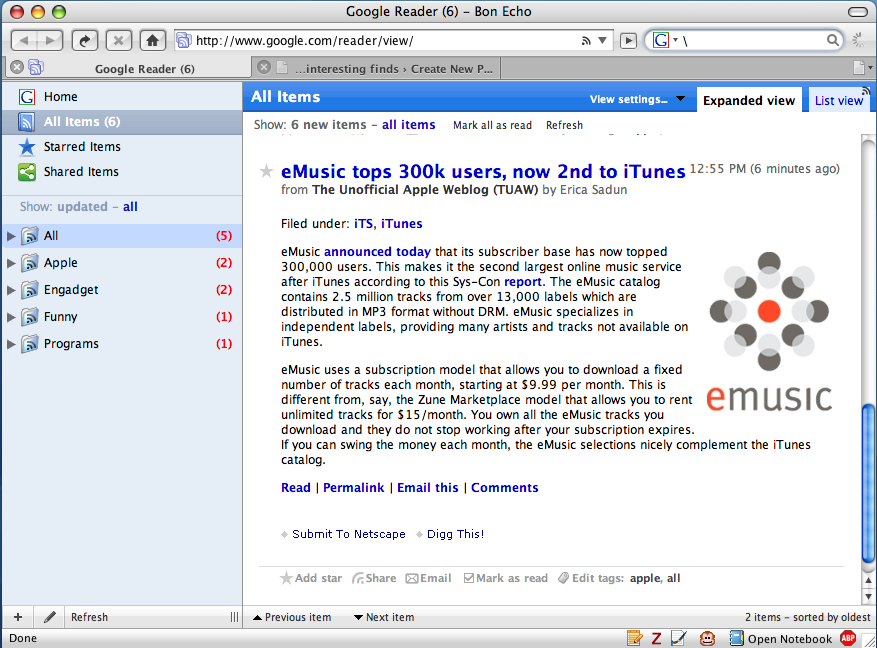
I use Google Reader not just every day but almost every hour – it is one of my main websites since it combines (almost) all of the different sites I enjoy reading. Today, I discovered a Mac theme for Google Reader by Jon Hicks, which not only makes the site more beautiful, but also seems to make it a bit more usable.

Unfortunately, Hick’s site is receiving tons of publicity today, which crashed his website. However, his instructions and a mirror for the theme is provided below. The theme required the Stylish Firefox extension, or some tinkering for Safari or Opera users. The installation directions as posted on the website are below:

Installation

Download gReader.zip. There are 2 versions, one for Mozilla browsers and one for WebKit & Opera.

Firefox

Once you have the Stylish extension installed, just copy and paste the css into the ‘create styles for this page’ window.

Camino

In Camino, either paste this into your /Library/Application Support/Camino/chrome/userContent.css file, or if that file doesn’t exist, rename the greader.css file to be userContent.css. The theme will be applied when you restart Camino.

Safari

Once Safaristand is installed, place the greader.css file in your user/Library/Safari/Stand/UserStyleSheets folder. Then visit Google Reader, go to SafariStand > Settings > Site Alteration. Add the site, enable Site Alteration and choose the greader file from the list. Make sure the matching pattern is just www.google.com. You may have to empty your cache, restart Safari and refresh before seeing any changes!

Omniweb

In Site Preferences > Page Appearance, choose the greader.css file under ‘Style Sheet’. The change should happen instantly!

Opera

Put the greader.css file anywhere you like! Right-click on the Google Reader page, choose “Edit Site Preferences” and select the CSS file through the display tab, under ‘My Style Sheet’. Like Omniweb, the change should apply immediately.

Its a beautiful theme, and a similar one exists for Bloglines as well. Enjoy.

The Quickest Silver Ever

March 27th, 2007

Quicksilver

I am a big fan of Quicksilver. Rare is the day that I sit in front of someone’s Mac without recommending they download it. However, it wasn’t always like this. Even as an avid reader of all kinds of Mac sites, it was only after several months that I realized how truly powerful, simple, and effective Quicksilver really is.

If you haven’t heard of Quicksilver before, it is a file launcher. I’ll provide an example: Lets suppose I needed to open up good ol’ trusty TextEdit. On a regular machine, I would go to Finder, go to Applications, find TextEdit, and double click on the icon. That seems like a lot of steps for an action I do all the time. With Quicksilver, I simply press Apple+Space, start typing the first several letters of TextEdit, and it brings up the TextEdit icon for me, and I simply press return to open the program. Quicksilver does all of the finding for me. All I need to do is know the name. It also works for your files, not just applications. It also does all kinds of other interesting things. If you’re a visual learner like me, there are tons of Quicksilver tutorials on YouTube (like this one). Sounds both helpful and a little daunting right?

Luckily, LifeHacker, a website that I read daily has offered a Beginner’s Guide to Quicksilver, which, in very basic terms explains what Quicksilver is, how to install it, and several great ways to use it. This is the first part in a multipart series, and I will update you guys on when new parts come out.

I highly recommend every Mac user get and use Quicksilver (its 100% free!) as well as read the LifeHacker guide. It is by no means a “poweruser” tool, and is an extremely useful addition to any Mac.

items of interest
my journal

this is my technology, a collection of tips, tricks, and goodies that I find on the web.